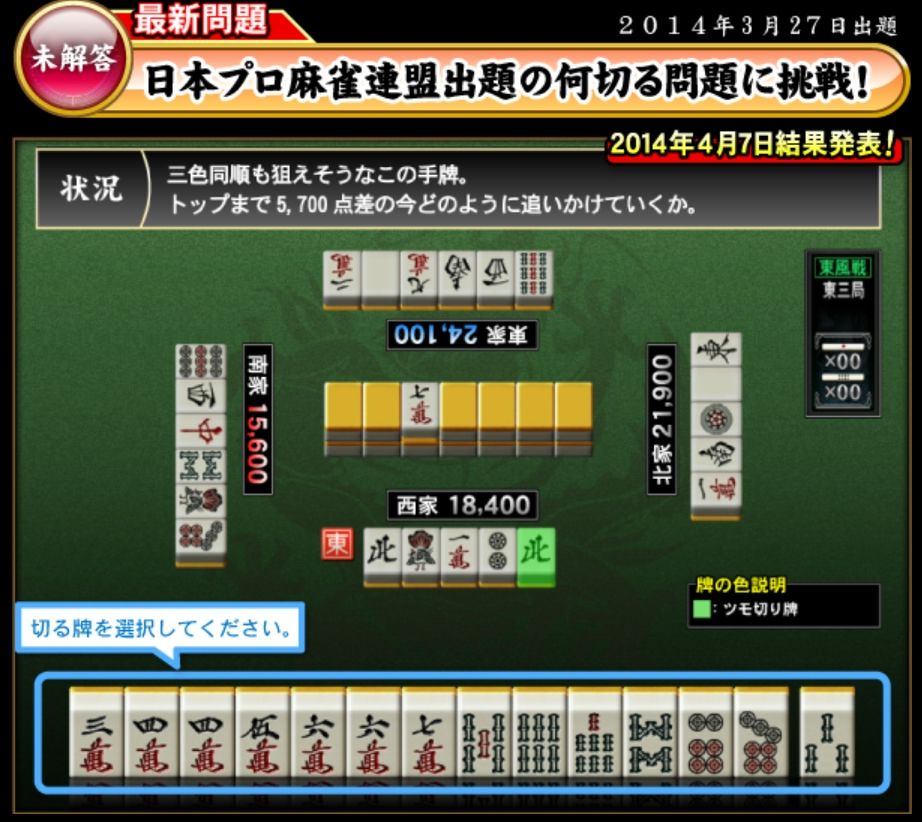
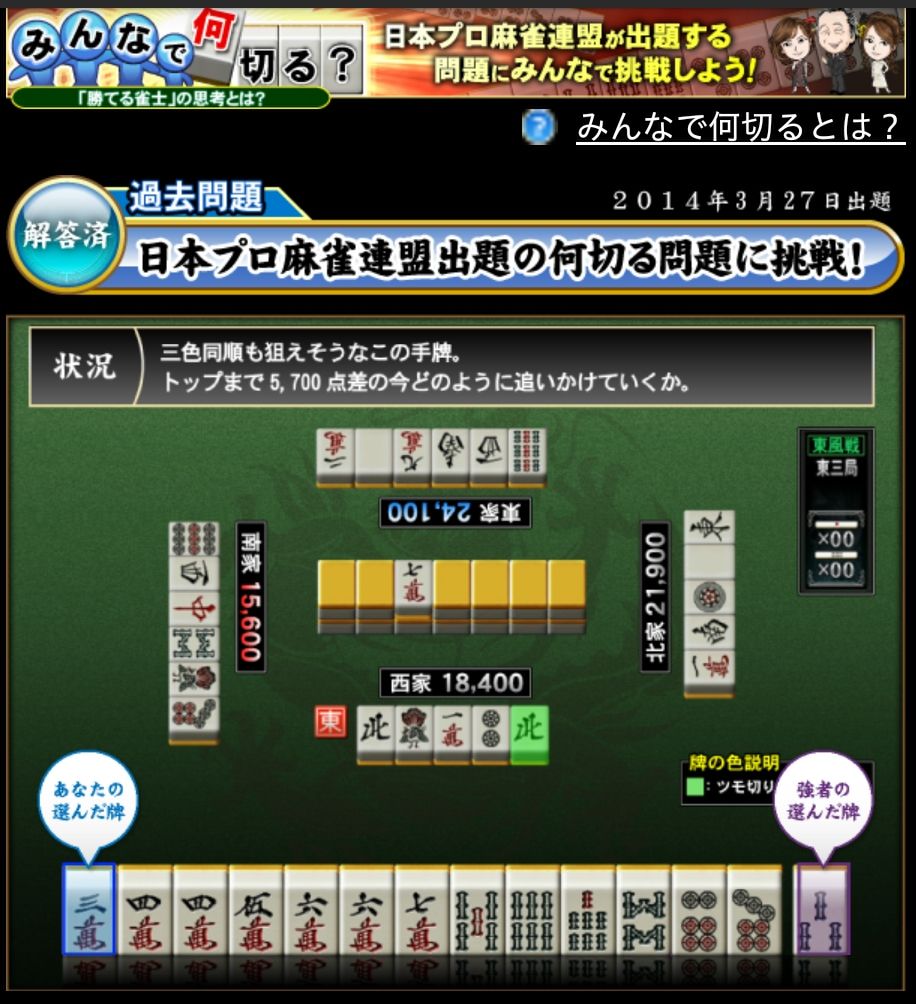
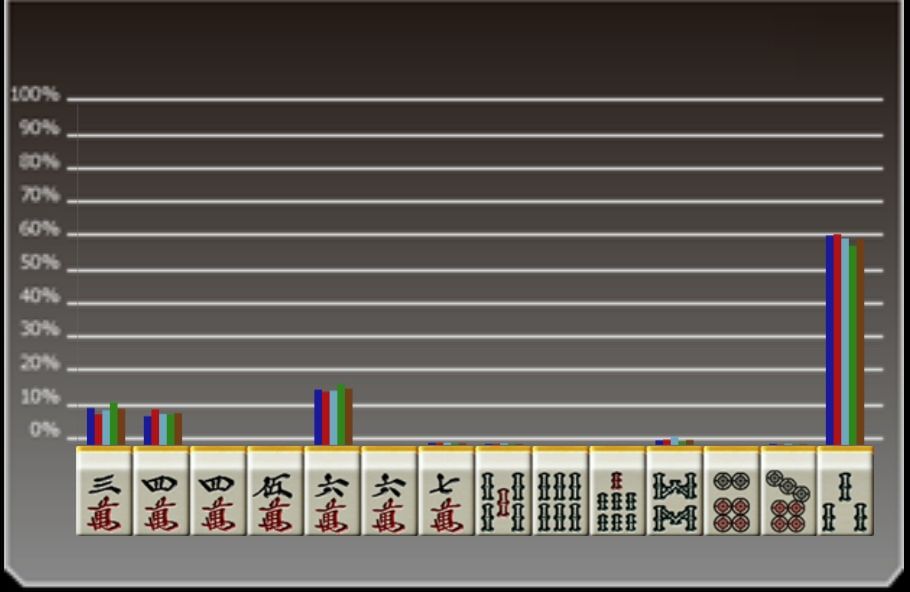
I went with tsumogiri’ing the

as my timed response, (ie treating it as if it was a game and making the discard decision within a reasonable timeframe) with the idea of going for Sanshoku in the 5678 range. We’ve already got 5678 in Bamboo, and the core of 67 in Dots, while in Craks we have the 67 core as well but also a 56 start meaning we can go either with 567 if we draw a

and be left with a 67 wait, or 678 and be left with a 56 wait if we draw the

. The 5 or 8 of bamboo will be discarded once we know which way the sanshoku will go, with the head most likely being the two 4-craks. We also have tanyao and most likely pinfu, so we could be looking as high as mangan or haneman, assuming we reach, depending if we get a dora for the sanshoku. My
ideal shape for this hand would be 4455667 crak, 567 bam, 567 dot, discarding the 3 crak and 8 bam to get to tenpai.
Looking at it in more depth:
We’re currently in ryanshanten. Also it’s likely that South is building a Crak based hand, so we probably can’t rely on chi’ing any crak’s from them for a while. Also we likely have 1 run in dots and one to two in bamboos, leaving 1 to 2 in craks, also the head will most likely be coming from craks too. So looking at the possible discards:
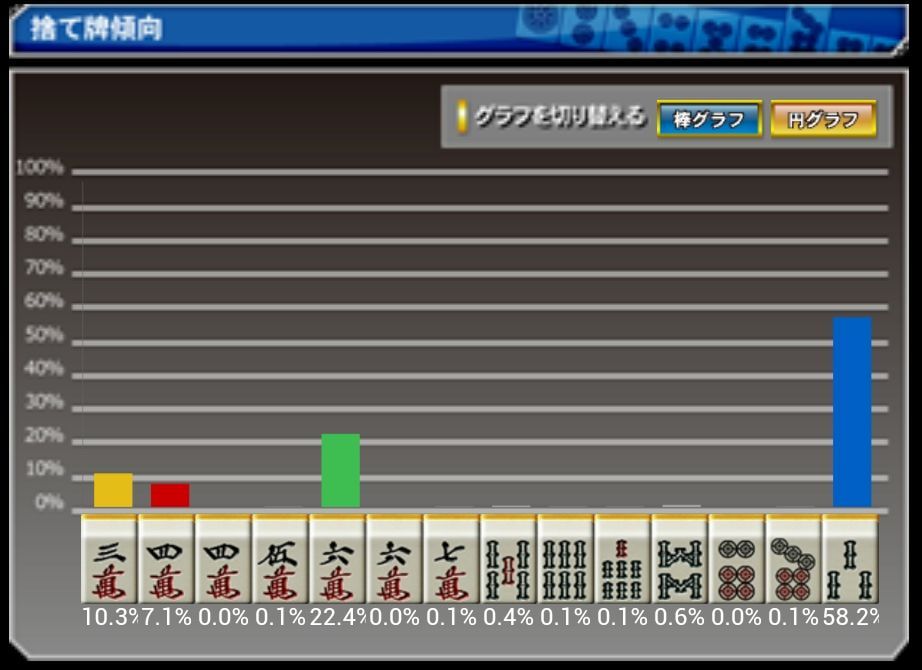
First off I think we can rule out the

. It doesn’t seem to achieve anything other than setting you back and likely putting you in furiten.
Also the bamboo’s other than the
I think we can also rule out since if you’re not discarding the
you’ll be wanting the other 4 to make up your two runs.

and
might look similar at first glance but they are not quite the same. While they both drop us to iishanten, dropping the
means we’re aiming for a head of

and either a run of 567 or two runs out of 56 and 67, depending if whether we draw a

before a crak to complete the runs. It also keeps the chance of a 67 core sanshoku alive. While tossing the
gives a similar set up of a

head and two possible runs in the 3445 area we lose the chance at sanshoku without really gaining much. The downside of aiming for two runs in craks is that one of the runs, either the 56 or the 45 will have a vastly smaller pool of tiles to use to complete it due to the head taking up two on one side and the other run taking up one on the other, leaving you with only 5 tiles out of a standard 8 for a ryanmen wait. Also the 34 run is further hampered by a

having been discarded by the dealer, making the
even less desirable than the
.
and
also drop us to iishanten. But again, due to using the one you didn’t drop for the head, the
is less optimal as you lose your chance at sanshoku.
The
I’ve already covered above.
The two dot discards I personally don’t think have any merit. You’re basically changing a ryanmen setup for a kanchan set up (67-dot for 35-bam) with no added benefit, and also the loss of a chance at sanshoku. And hoping the draw one of the other 3

or 2

seems like a downgrade since you can aim for either the 58-bam as your head which has the same number of tiles available but you don’t have to exclude one option. Or just keep the runs in dots and bams and use one of the readymade heads in craks.
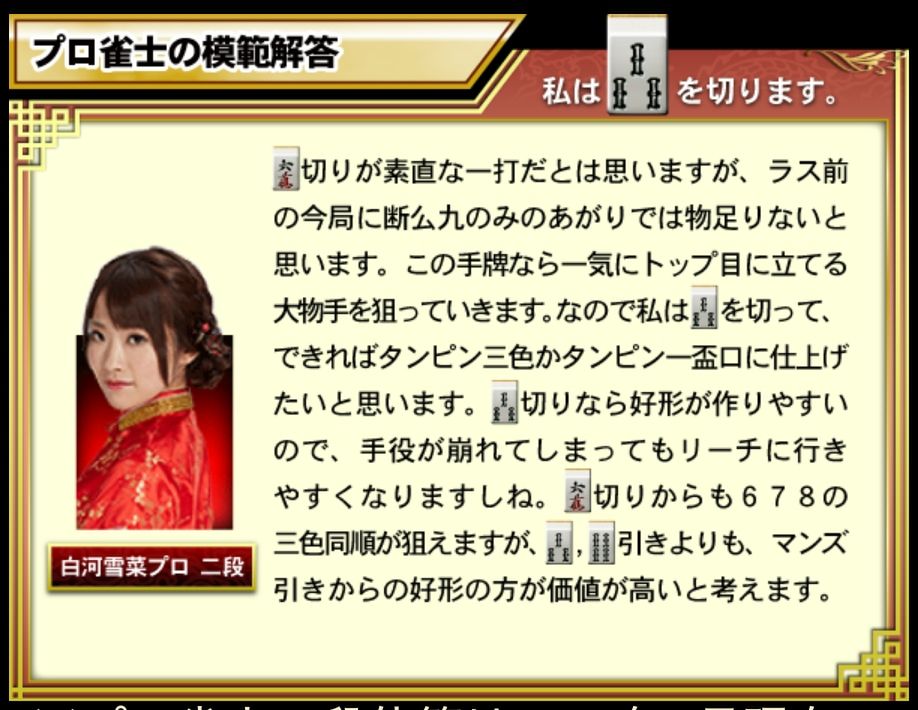
In hindsight I think maybe the
is actually the better option rather than my initial choice of the
. Mostly because with my
discard I’d be aiming to discard the
at some point anyways, so it makes more sense to get to tenpai on the chance of drawing a
. You still keep the ryanshanten for the ideal tanyao/sanshoku/pinfu/iipeikou, but also have the option to reach for tanyao/pinfu only if you draw the
.
Iapetus: I’m trying to wrap my head around your idea. It seems so different to how I think of things that I want to be able to understand it. You’re saying that keeping the iishanten is of highest importance, which I can understand. I’m just confused since with the 6 (or 4) crak discard the only tiles that get you into tenpai are the
,

, and

. None of which use two runs in craks which you seem to be aiming for, suggesting you’d need a second tile to be able to get into tenpai with two crak runs. If the next tile you draw is a 258 crak and discard the 4/6 crak to complete the two crak runs then you still need your head and you’re looking at a tanki wait if you draw a 5 or 8 dot. Drawing a 358 bam is nice as it sets you up for at least a ryanmen wait, and possibly a 3 way wait, but it only changes the shape of your iishanten rather than gets you to tenpai. I’m not suggesting this is wrong; I’m just trying to understand it.
Also kfcbbq: We’re actually West in this hand, not the Dealer. The red

symbol is designating who was the starting dealer for the game.